Standard Admin
This guide helps tenant administrators (non‑recruitment) configure the essential parts of Padocare: Groups, Managers, Attendance Types, and Carer onboarding. No provider setup is required here.
Roles & Permissions (simple explanation)
These roles decide what each person can see and do. Keep it simple and give people only what they need.
- Admin: Full access. Creates groups, adds managers and carers, changes settings.
- Manager: Day‑to‑day running. Can view assigned groups/teams, approve/monitor work, and manage members (as allowed by your policy).
- Auditor: Read‑only. Can view activity and reports but cannot make changes.
Tip: Start with one Admin, add Managers for each area/ward, and create Auditors only if you need oversight or external review.
Groups and Carer Membership
Use groups to organise carers by site, ward, specialty, or team. You can optionally set default rates on a group if your process uses them.
- Create a group: Go to Groups → Create. Name it clearly (e.g., "Ward A – Days").
- Add members: Click Assign Members, tick carers to include, and save.
- Manage membership: Use View Members to remove carers when needed.

Best practices
- Use a consistent naming pattern so staff can find the right group quickly.
- Review group membership weekly to keep assignments smooth.
Managers and Roles
Add managers to help approve requests and oversee teams.
- Create a manager: Go to Users → Managers → Create. Fill in details and assign the appropriate role.
- Access: Limit access to only what they need (e.g., viewing specific groups).
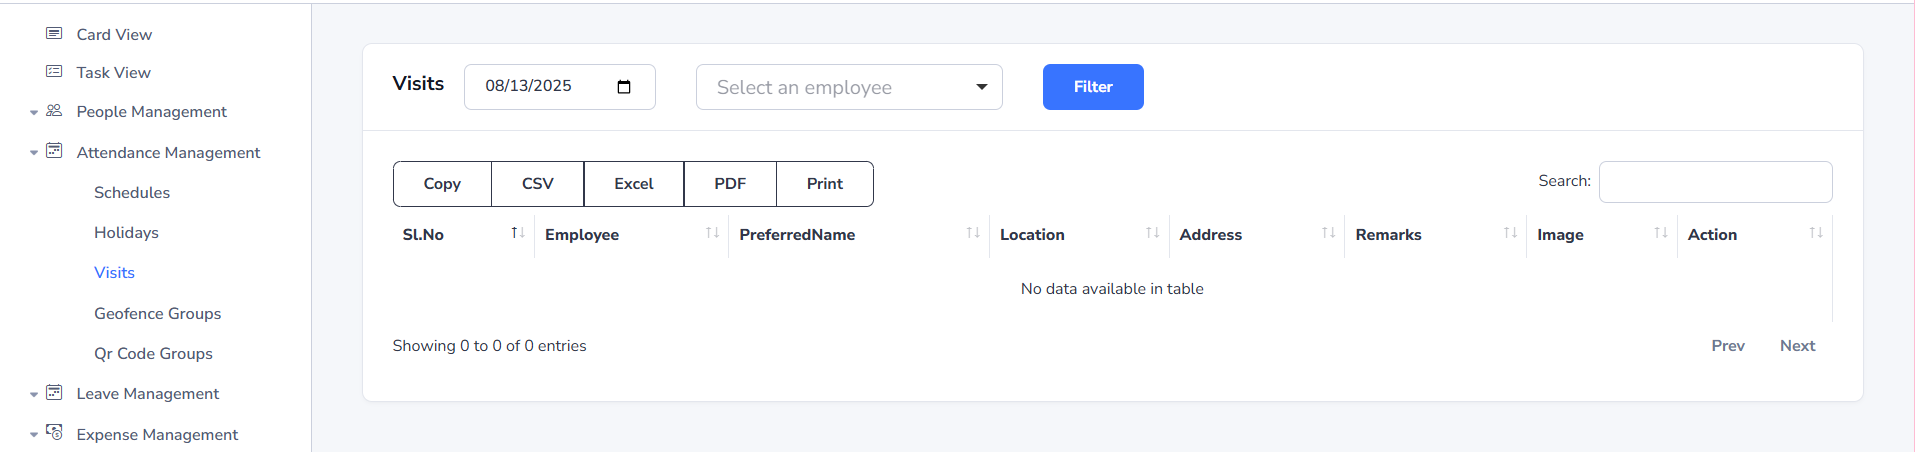
Attendance Types
Shift types determine how hours are calculated. Keep them simple so teams can record time easily.
- Go to Settings → Attendance Types.
- Add or edit types like All Day, Night, or Custom.
- For Custom, hours use the start/end times on the request.
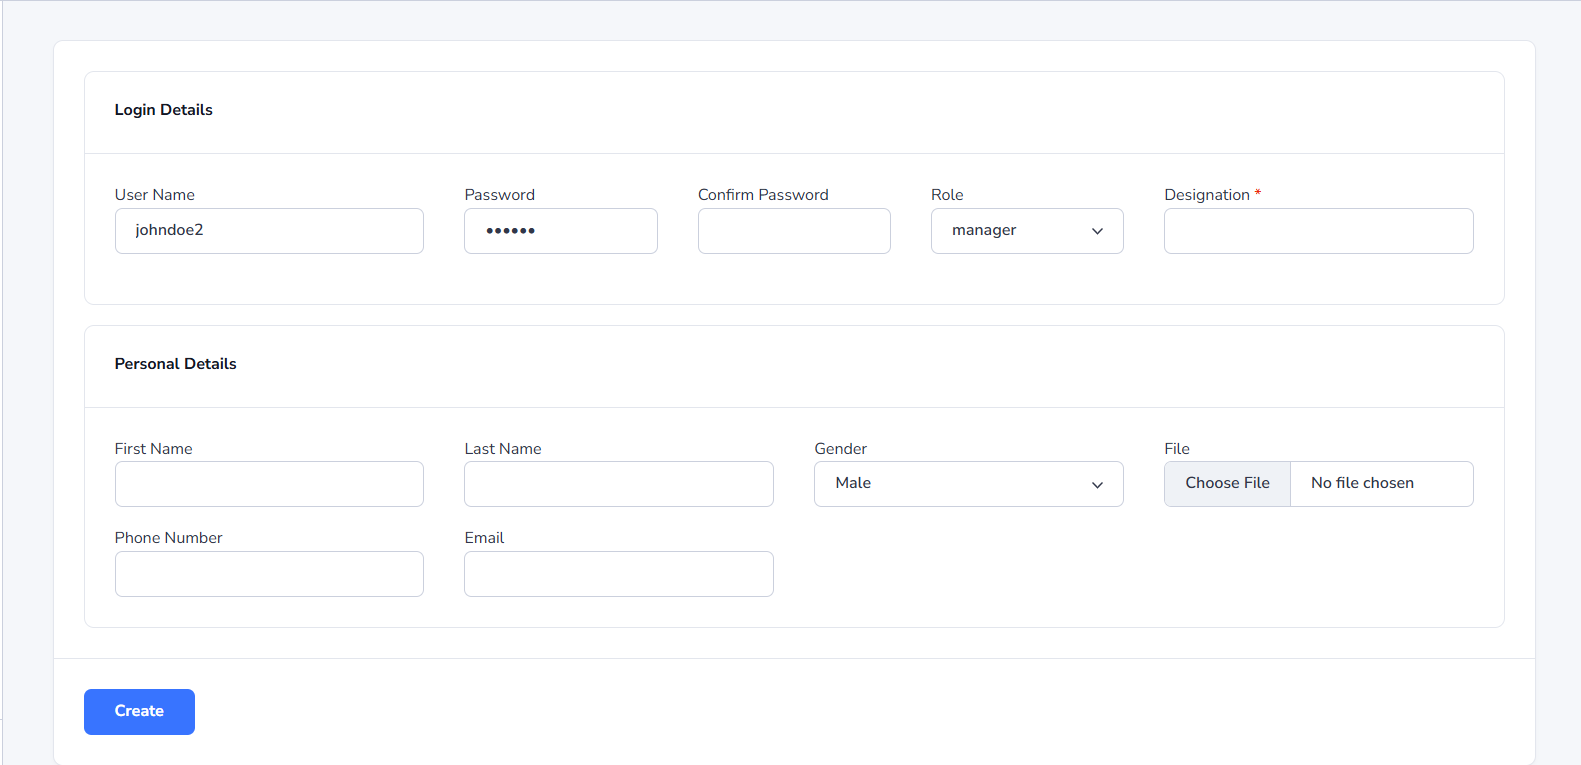
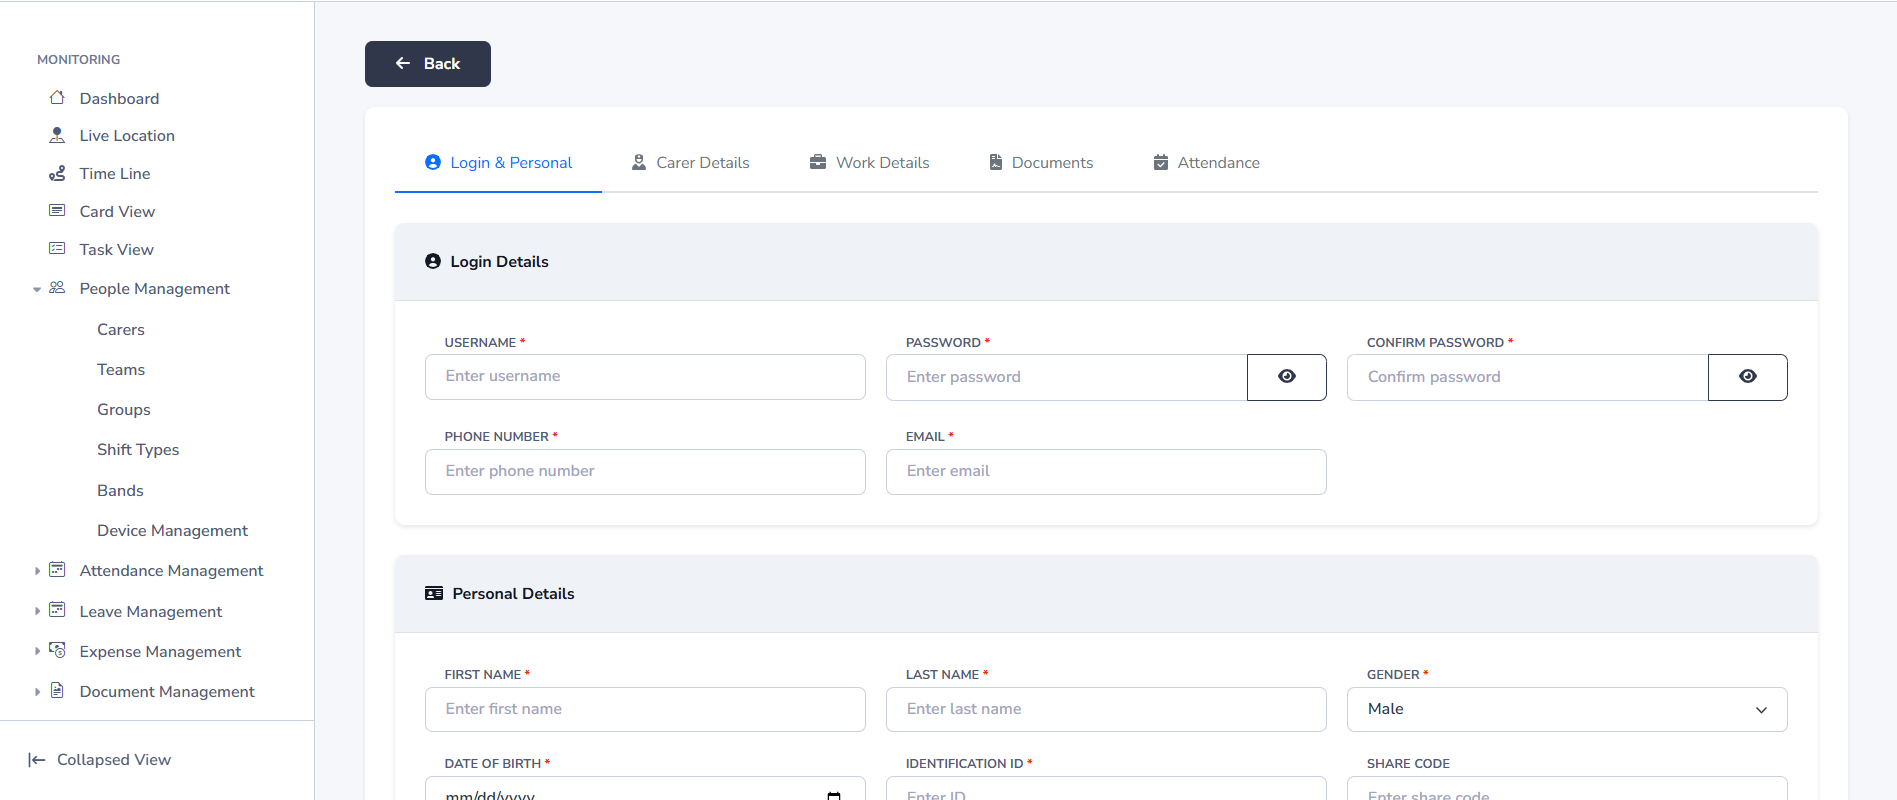
Carer Onboarding
Bring your staff into the system so they can receive shifts and record time. Keep it simple and complete the essentials first.
Before you begin
- Initial Settings completed (country, currency, distance unit).
- Groups created (so you can assign the carer to the right team/site).
- Attendance Types decided (so hours calculate correctly).
- Documents ready to upload (e.g., ID, right‑to‑work, training) if your policy requires them.
Add a carer (step by step)
- Go to Carers → Create.
- Profile: Enter name, email and phone. The email is used for sign‑in.
- Role: Leave as Carer (no admin rights).
- Groups: Select one or more groups the carer belongs to.
- Documents (optional): Upload required files per your policy.
- Save: The carer appears in your lists and can be scheduled/assigned.
What fields matter most
- Email: Needed for the person to log in and receive notifications.
- Group: Needed so managers can find and assign them quickly.
- Documents (if required): Keep compliance up to date to avoid delays.
Troubleshooting
- Can’t select a group? Create the group first under Groups.
- Save stays on the page? Check for any red messages (missing required details).
- Carer can’t log in? Confirm their email address is correct and active.
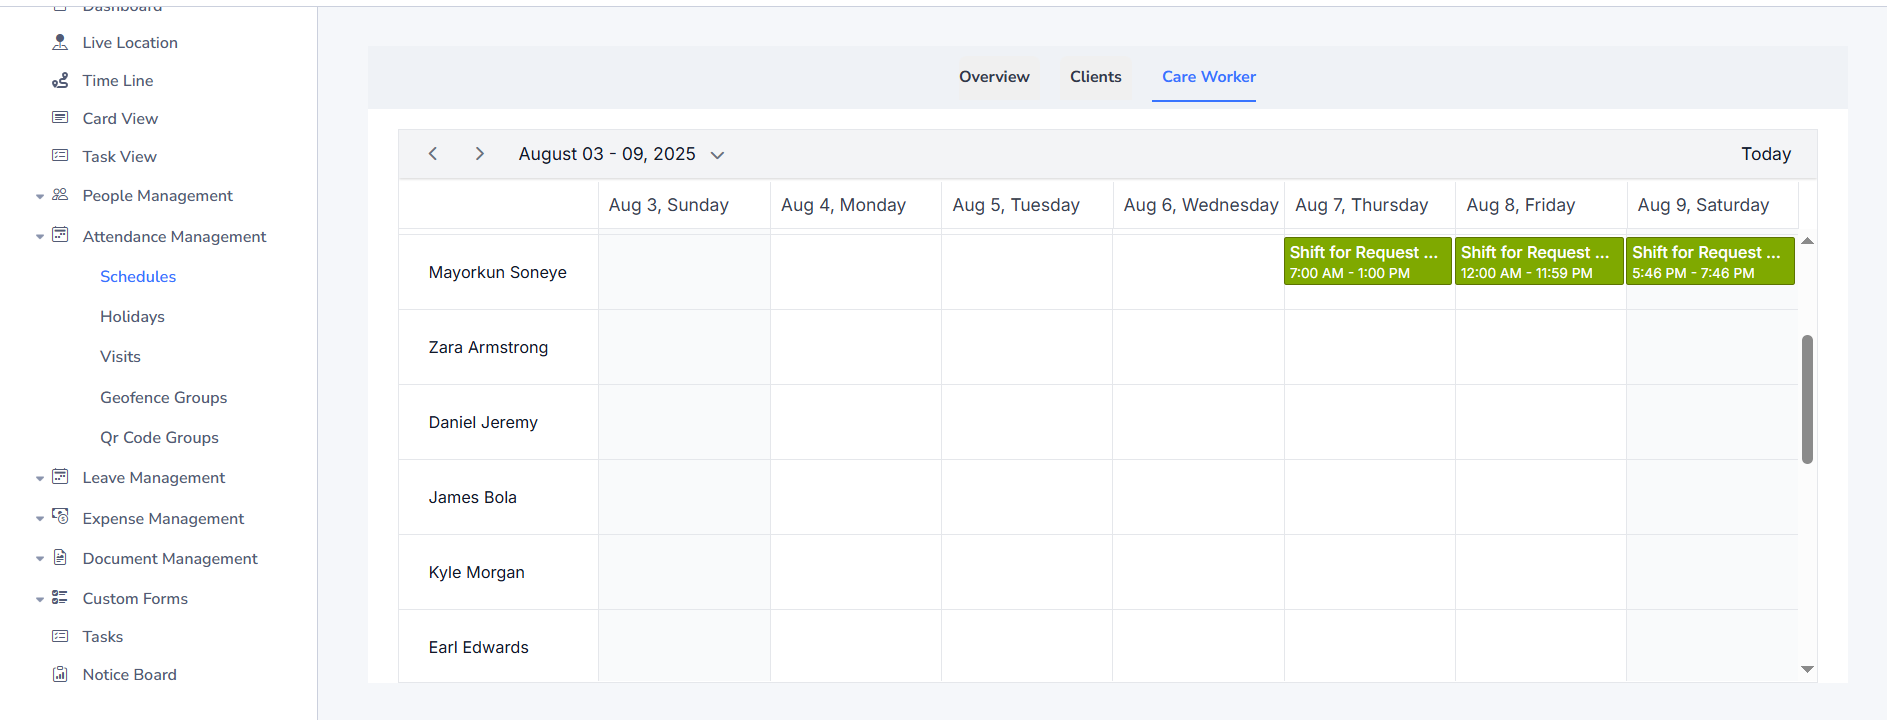
Scheduler (Rota)
Plan who works where and when. Publish rotas so teams can see their shifts.
- Open Scheduler: Go to Scheduler/Rota from the menu.
- Filter by group, site, or date range to focus your view.
- Add shifts: Click a cell/day to add or edit a shift for a carer.
- Publish when ready. Unpublished rotas are visible only to admins/managers.
Tips
- Use filters to focus on a single ward or team.
- Agree a cut‑off time for changes after publishing.
How this differs from Recruitment Agency
- Scheduler/Rota is available here for planning internal shifts; recruitment agency setup usually does not include this.
- Provider onboarding/rate overrides are generally not needed here; those are used by recruitment agencies.