Recruitment Agency Admin
This guide helps agency admins configure the essentials for operations. We’ll focus on Bands (rates), Groups (organising carers), and Provider onboarding. Request creation and matching are covered in the Provider guide.
Roles & Permissions (agency)
Give people the right level of access based on their job.
- Admin: Full access; sets up bands, providers, and pricing.
- Manager: Operates day‑to‑day; can view groups/teams and manage members.
- Auditor: Read‑only access for oversight and reporting.
Tip: Start with one Admin. Add Managers per client/site, Auditors only when needed.
Quick checklist
- Create Bands and set default hourly rates
- After onboarding Providers, add per‑provider overrides where needed
- Create Groups and assign carers
- Onboard Providers (company admins)
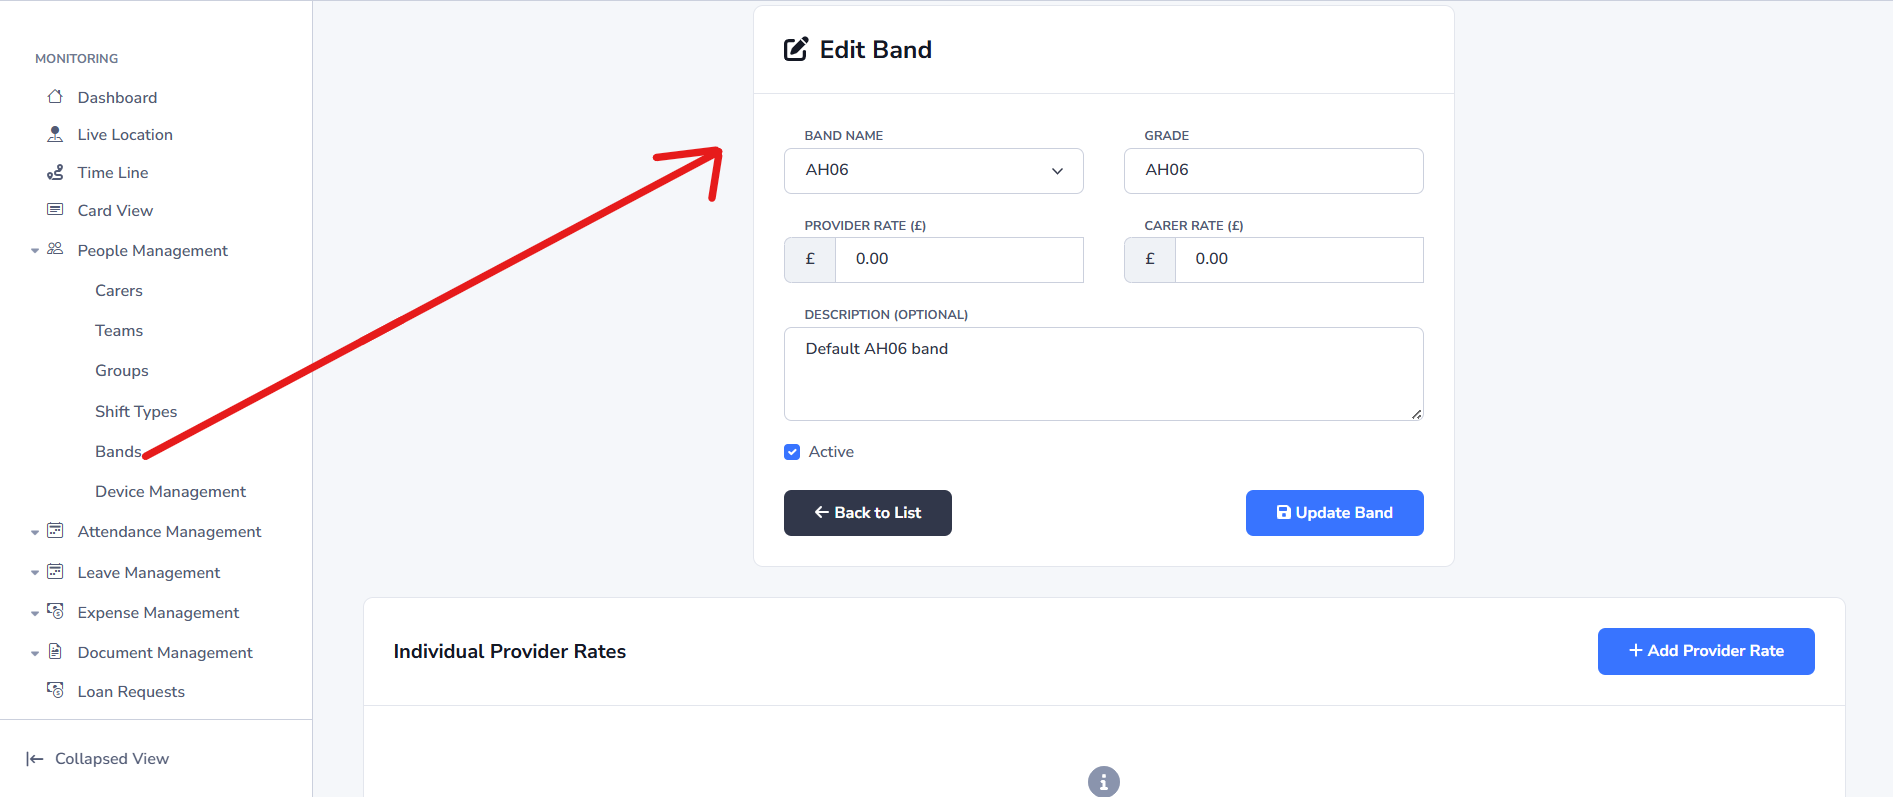
Bands and Rate Overrides
Some Bands are created for you by default. You must review them and set your own prices before using requests.
- Open Bands. If a default band exists (e.g., HCA G2, RGN G5), click Edit and set your Provider and Carer hourly rates. You can also create new bands.
- After you have onboarded your Providers, open each band → Individual Provider Rates to add provider‑specific prices (optional).
- If no provider override exists, billing will use the band’s default rates.
Groups and Carer Membership
Groups help you organise carers (by site, ward, specialty, or team). You can also attach default rates if you use them.
- Create a group: Go to Groups → Create. Give it a clear name (e.g., "Ward A – Nights") and optional default rates.
- Assign members: On the group page, click Assign Members, select carers, and save. Members appear in the list immediately.
- Remove a member: Use View Members → click Remove next to a carer to detach them from the group.
- Provider-specific rates (optional): If your process needs it, open Individual Provider Rates to set overrides per provider for this group.
Best practices
- Use a consistent naming pattern (e.g., Site – Area – Shift) so teams can find the right group quickly.
- Keep member lists current. Remove leavers and add new joiners weekly to avoid assignment errors.
- Prefer band overrides for pricing. Use group overrides only if your operations require group‑level pricing.
Troubleshooting
- Carer not visible in the picker? Check they’re active and not already assigned to the group.
- Rates not applying? Confirm whether a provider override exists on the band or group, and which one your process should use.

Provider Onboarding and Linking Rates
Onboard your partner providers (agencies/organisations) and link their agreed rates per band.
- Create provider users: Go to Users → Providers → Create. Enter name, email and set the Provider role.
- Send access: Confirm they can sign in (they'll receive an email or you can share credentials securely).
- Link rates in Bands:
- Open Bands → choose a band → Individual Provider Rates.
- Select the provider, then enter the agreed Provider Rate and Carer Rate for that band.
- Save. Repeat for other bands and providers.
- How billing uses these: If a provider override exists for the selected band, invoices/payslips use it; otherwise the band default is used.
Troubleshooting
- Provider not listed when adding a rate? Ensure the user was created with the Provider role.
- Rate not reflected on invoices? Check the correct band has an override for that provider.
Billing and Payslips
Provider invoices and carer payslips use Band rates, with per‑provider overrides where set.
- Invoices: Provider hourly rate comes from the band override; if none, the band default.
- Payslips: Carer hourly rate comes from the provider override on the band; if none, the band default.
- Check shift hours (custom vs presets) to ensure totals are correct.
